Tuesday 13 October 2015

Halloween Milk Carton Box


Halloween is nearly here and I hope you've be enjoying the projects I've been sharing. I've loved working with Stampin' Up's Halloween range this year, especially the Witches' Night stamp set (I know! I've kept so quiet about it too!).

This is my little Halloween Milk Carton Box and I love it! I'm especially proud of the nod to the Amityville Horror in the dear little Dutch gable above the door.

Yeah... That probably sounded a *bit* weird.

 
I've decorated it using the Happy Hauntings Designer Series Paper pack. It's full of fun little Halloween patterns that aren't too in-your-face. And of course the Spider Web Doily had to put in another appearance! I've doubled it over the closed top of the box and held it in place with a mini peg (covered by the stamped crows), so it's removeable.

And that's important because...


The box is top opening, so you can drop treats in! At around 2.5" x 2.5" x 3.5", it's big enough to hold something substantial - maybe even a cupcake?


I used the Gift Bag Punch Board to make this basic milk carton box shape 


Yup! You can use the Gift Bag Punch Board to make milk carton boxes and I have a video tutorial showing you how to make the basic box, above, here. (I've also uploaded tutorials for making lidded milk carton boxes too - have a poke round my blog).


I made the roof tiles using the scalloped die from the Cutie Pie Thinlits die set. I used it upside down to cut pointy edges & layered them up. You can get the same effect using scalloped scissors.

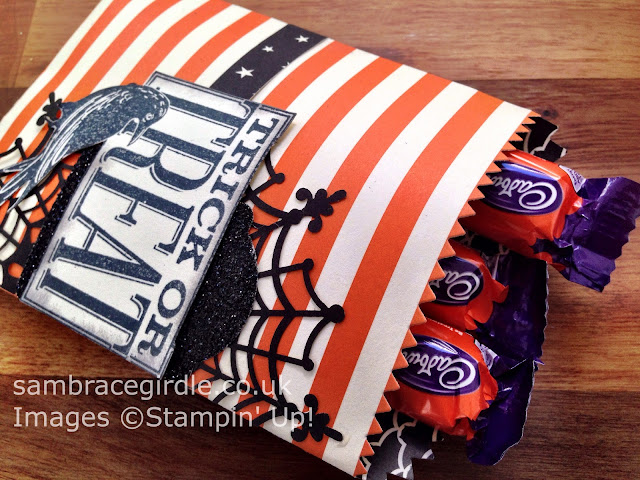
For the door, I punched some Black Glimmer Paper using the Note Tag punch, and also punched out a couple in orange paper & used them behind it, to frame it. The Dutch gable is a section of the Trick or Treat stamp from the Witches' Night stamp set (that's where the crows on the peg come from too). Just make sure you glue it by its bottom edges to the top front edge of the box and not the edges of the "roof", so that the box can open without tearing it.

I made the windows by punching small squares of the spider patterned paper and sticking them together with a gap, to look like a frame. The window ledge is an offcut from the treat bag I made the other day (see? Never throw anything away!!).


Then I layered some spider web doilies on the walls of the house to give it some more texture and interest.

My favourite little finishing touch is the wee ghosty in the attic - he peers mournfully out from under the eaves at the back of the box. He's cut out from a piece of the patterned paper too, and popped up on Stampin' Dimensionals.


Hope you like it & have a go at making one yourself. Let me see what you make if you do!

You can buy the elements I used from my Stampin' Up! shop & it would be ace if you did :)


Built for Free Using: My Stampin Blog

Saturday 10 October 2015

Halloween trick or treat bags


Here's another Halloween project - this time a little bag to gift sweet treats to spooky doorstep visitors!


The bag is made using the Mini Treat Bag Thinlits die, so you'll need a die cutting machine like the Big Shot to use it. I love its attention to detail, right down to the serrated edge along the top. Make it in thin brown paper & it would be a proper little sweetie shop bag!

The bag particularly suits a long, narrow snack like a Finger of Fudge. However, if you're feeling in a tricksy mood yourself you could turn the tables on your visitors & fill random bags with healthy cereal bars & an educational tract on bio-diversity in the Peak District. 


And I wonder why my house gets egged on Halloween...


The striped and star papers are from the Happy Haunting designer series paper pack. The papers are double sided and while one side is Halloween themed, flip it over and the other can be used for any occassion. 

The Trick or Treat stamped sentiment and bird are cut out from one of the large stamps in the Witches' NIght stamp set. I love that set, it's definitely a keeper.

I've mounted it all on some black glimmer paper (a great accent paper, don't just keep it for Halloween) and a spider web doily (at just £4.25 the cheapest way to inject a little Halloween fun into your craft projects).

Here's what I used. You can click on any of the items and buy them from my Stampin' Up! shop. And if you're thinking of slamming in a big order (£200 or more - hey, it can happen!) until 9 November you'll receive extra Stampin' Rewards to spend in the catalogue - see http://www2.stampinup.com/ECWeb/ItemList.aspx?categoryid=140000 for more info :) 

Built for Free Using: My Stampin Blog

Wednesday 7 October 2015

Halloween Tiara - ooh la la!


I know what you've been thinking. 

Where, oh where, oh where can a happy-go-lucky, gal-about-town get a go-anywhere, shabby chic Halloween tiara? 


Step this way, ladies, your search is over. For I have fashioned this glam little number using only the Witches' Brew stamp set and my brains. And some other things.

It's quick and easy to make. You'll need a tiara band (I got mine off eBay, a pack of 10 was around £3) and a hot glue gun.


The tiara bands grip your hair very well, so it should see you safely through Trick or Treating & onto some modest partying of your own.

Here's a how-to video. It goes a bit shonky in places, but I'm sure you get the general drift!


You can buy the supplies from my Stampin' Up! shop & it would be ace if you did!:
Built for Free Using: My Stampin Blog

Monday 5 October 2015

Vellum window Christmas card


Here's a simple little card that gives a sense of winter's chill - and the cosiness that awaits inside! It's a 4"x3" window card, with the image stamped and coloured on cardstock inside.


Here's what I used (as ever, swap in what you have on hand):
Built for Free Using: My Stampin Blog


And here's what I did:

  1. Cut a piece of red cardstock using the larger of the Project Life Label framelits (or cut a piece to 6"x4"). Score the middle of the 6" side at 3" to form the card base. 
  2. Ink up the Dots for Days background stamp with white pigment ink, and carefully stamp what will be the front side of the card. Blast it with a heat gun or set it aside for a little while to dry, so that it doesn't smudge.
  3. Take the 1 3/4" circle punch and punch a hole in the upper middle section of the front of the card. I just eyeball it, but for more precise punching, punch a piece from scrap card & glue it to the place on the card you want the hole to appear. Then position your punch upside down over it (so you can see what you're about to punch) & punch!
  4. For the card inner, select paper or cardstock that will withstand watercolouring without starting to "pill" - Whisper White Shimmer cardstock is perfect. Cut a piece using the smaller Project Life Framelits die (or to a fraction smaller than 4"x3"). 
  5. Place the liner inside the card, where you want it to appear, & close it. Take a pencil & very lightly trace the outline of the circle you just punched onto the card underneath. Remove the liner from the card.
  6. Ink up the house and tree stamp from Cozy Christmas with Tuxedo Black ink. Carefully hold the stamp over the circle, trying to position it so that the bottom of the house will stamp about 2/3 of the way down the circle. Take a deep breath and stamp! Set with a heat gun or put aside to dry for a little while. Once dry, take a rubber and lightly rub out your pencil lines.
  7. To colour in, scribble the Pool Party marker onto a plastic surface & pick up a little colour with the Aqua Marker (or a paint brush). Blend the colour lightly, so that it's darker at the top of the sky and lighter towards the house. Colour the trees and the window with the other two inks. Allow to dry.
  8. Take some Dazzling Details gitter glue and dot it anywhere you want the snow to shimmer - the roof, some of the boughs, along the ground. Set aside to dry. Once dry, attach the liner to the inside of the card with glue or double sided tape, so that the house appears through the window.
  9. To decorate the window, punch out a piece of vellum with the 2 3/8" scallop punch. Dot the vellum with a few dots of glitter glue if wanted, or you could stamp tiny snowflakes and emboss with the Iridescent Ice embossing powder.
  10. Use the 1 3/4" circle punch to punch a piece out of the blue paper from the Home for the Holidays paper pack. Position the 2 3/8" scallop punch over the hole in the paper you just punched and punch again - this will give you a scalloped frame. 
  11. Trace a thin line of glue round the back side of the outer edge of the scalloped vellum & stick it to the front of the card, so it covers the punched hole evenly. Do the same for the scalloped frame, line up and stick over the vellum, so that it masks the scalloped edges and the sides of the red punched hole are not visible.
  12. Stamp Have a Cozy Christmas on white card. Punch out with the Word Window punch. Cut a strip of red card that is a fraction wider &  longer than the Word Window punched piece. Round the corners with scissors or a corner rounder and mount the stamped sentiment onto it. Mount onto the front of the card & you're done!
  13. (If you have an envelope punch board you can make an envelope using the 6th set of measurements & a 6"x6" piece of paper).


Sunday 4 October 2015

Fab. U. Lous


Halloween tiara. Or, if you will, fascinator.

Instructions coming very soon... 

Saturday 3 October 2015

World Cardmaking Day giveaway


To celebrate World Cardmaking Day (yes, it IS a thing. Look it up!) I'm giving away one of my favourite Stampin' Up! cardmaking kits. The Hip Hip Hooray kit contains everything you need (even ink, stamps and glue) to make 20 cards. Sadly, it's now retired, but you can get your hands on one by doing two things: like my Facebook page https://www.facebook.com/stampinsam, then leave a comment under this post: https://www.facebook.com/stampinsam/posts/1652824401651207:0 

I'll pick one winner at random on Sunday at 7pm (UK time). :)