Sunday, 21 June 2015

Cake slice gift box


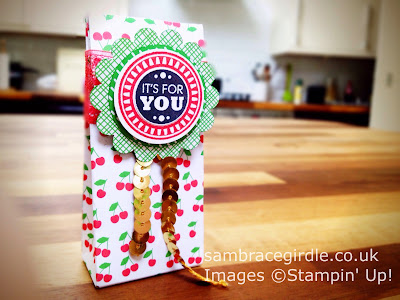
I made this lovely cake slice gift box using the Cutie Pie thinlits dies to cut the box out, and the Sweet Stack stamp set for the sentiment.

They have a rear closure & really do make lovely little gift & favour boxes. You can put sweets, money & tiny tokens in them.


The thinlits come with lots of little extra pieces I've not used here. In addition, I've added a paper flower made with the spiral flower die. The leaves are from the retired Flower Frenzy die. The nearest current equivalent would be the Bouquet Bigz die.

I am on a diet & would love to be able to bouncily declare that this cake "is as good as having the real thing!!". 

It is not. 

Thursday, 18 June 2015

Lidded milk carton box tutorial - part 2 (video)


Here's the final part of my milk carton box tutorial using the gift bag punch board - decorating the box.
 
No, I don't know why my voice cuts in over the intro either!
 
 
Hope you have a go at this, it's a great use of the punch board :)
 

Built for Free Using: My Stampin Blog


Tuesday, 16 June 2015

Lidded milk carton box tutorial - part 1


Yesterday I shared a sneak peek of some lidded boxes I made with the new Gift Bag Punch Board. 


Today's video shows you how to make the box, using a single sheet of A4 card stock (you can substitute 11inch wide card if you wish). Enjoy!


Built for Free Using: My Stampin Blog


Monday, 15 June 2015

Lidded milk carton box tutorial (video)


A few weeks ago I did a tutorial on how to use the gift bag punch board to make a milk carton style box. I've tweaked it a bit & now you can make a lidded milk carton box like these! I'll link the full video tomorrow. Meanwhile, here's an overview

Saturday, 13 June 2015

Clean and simple new baby card

 
I made this sweet new baby card the other day. I used the Project Life framelits to cut the card base and the white front, & repeat stamped "Hello" and the seed head image across the front. I stamped the bottle image in Blushing Bride  ink & raised it on  Dimensionals, Stampin' Up!'s 3d foam pads, with some Daffodil Delight seam binding for a bow.
 
The "Hello" & bottle image are from the Silhouettes and Script stamp set which is a lovely hostess stamp set - you can get your hands on it if you place an order of £150 or more.
 
It made a quick and effective card that's not too bogged down in pink or blue.
 
Built for Free Using: My Stampin Blog


Join my team!


Have you been thinking about joining Stampin' Up! as a demonstrator? Well, during June you can join and receive 2 stamp sets free, in addition to any items from the current catalogue to the value of £130, all for just £99.

There is no obligation to carry on being a demo & you don't have to do anything extra, so if you were thinking of placing an order worth around £100 it's totally worth signing up as a demo, as you could end up with up to £160-170 of product, depending on the value of the free stamp sets you choose.

here's why you might like to join my team...

Wednesday, 10 June 2015

Tree builder birthday

 
I love layered and collaged cards, and this card mixes the two.
 
I used the Sprinkles of Life stamp set and coordinating  Tree Builder Punch for the tree, and the stamped background comes from the For the New Two stamp set.
 
 
We'll be making this card (minus the machine stitching) at my card class. £10 to make 3 cards, 7-9pm 2 July. Message me to book a place.

Sunday, 7 June 2015

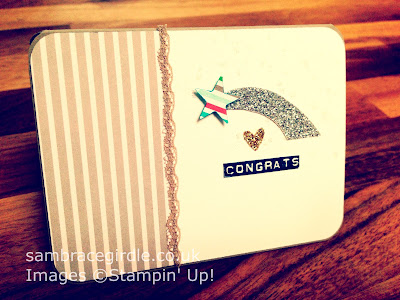
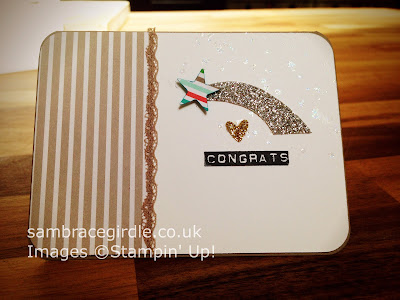
Simple star card


stampin' Up!

It's easy to get carried away with this stamp set and that die set, but of course you can create great cards with very few supplies.
 
I love using the Project Life label framelits, they instantly create a 3x4" card which is really modern looking. But not everyone has a Big Shot die cutting machine. So for this card I cut my base cardstock to 6x4", scored it down the middle to create a card & then rounded the edges using a corner rounder punch - if you don't have one, place a small coin on your corner & draw round it in pencil, then carefully cut with scissors. Easy - and the coin should ensure you get the same curve on each corner.
 
I cut the white cardstock so it was fractionally smaller than the base card & rounded the edges. the same with the striped paper (which is from the Cherry on Top 6x6" stack).
 
I stamped one of the spatter stamps from the Gorgeous Grunge stamp set with Versamark embossing ink & applied iridescent ice embossing powder & heat embossed it - you can just make it out in this picture. It gives a bit of depth to the finished card.

clean and simple card
 
If you don't have any of those, get a similar effect by dotting dazzling details glitter glue across the card, or a glue pen & some iridescent glitter.
 
I stamped the Congrats stamp from the Silhouettes and Script set (this is a hostess set, available to buy when you place an order for £150 or more. I bought it for these Dymo label type sentiments, which I love), but you can use any stamp set or sentiment. Or use the label maker that this mimics if you have one.
 
I hand cut the silver starburst from glimmer paper (I promise you this is the sparkliest glitter card you will ever see!! Use it sparingly for little accents like this & save your lower quality glitter card for matting & layering etc) and punched the little heart from the Owl Builder punch (although I could have handcut that too). The star is from the Itty bitty punch pack, but again, they are reasonably easy to hand cut too.
 
Finally, I cut the scalloped edge off the dotted lace ribbon & stuck that with a glue pen to cover the join between the patterned paper and white cardstock.
 
A simple, clean and easy card :)
 
You can buy any of these items from my Stampin' up! store 
 
And if you are having a bit of a shop & your order is approaching the £100 mark, think about joining as a demonstrator - you'll get 2 free stamps sets during June, as well as 20% discount on your order, and you don't  have to buy or sell any more if you don't want to. More details here and you can crack on and sign up (listing me as your demonstrator) at http://www.stampinup.net/esuite/home/sambracegirdle/promotions
 
Have fun & I look forward to welcoming you to Stampin' Up! :)
 
 
Built for Free Using: My Stampin Blog


Saturday, 6 June 2015

Sunburst gift bag

 
Today's make features Stampin' Up!'s new Gift Bag Punch Board. I made this bag quickly using a sheet of A4 Whisper White cardstock. I stamped the sunburst from Kinda Eclectic and layered up a couple of punched pieces in coordinating colours of Cucumber Crush and Watermelon Wonder.
 
Quick, easy, practical & stylish :)


Built for Free Using: My Stampin Blog


Thursday, 4 June 2015

Gift card bag


A cute little gift card holder I made using the Mini Treat Bag Thinlits & the new Cherry on Top 6x6 paper stack.

It fits a standard gift card you can pick up at the supermarket. In this case I chose a Costa Coffee card - I just had to trim a sliver from each edge of the cardboard carrier to make it fit.


Wednesday, 3 June 2015

Extra small gift bag with the Gift Bag Punch Board

use 6x6 papers to make extra small gift bags

If you want to use Stampin' Up!'s new Gift Bag Punch Board to make gift bags out of its new 6x6" papers, the instructions on the board would have you believe that you can't. The smallest piece of paper it gives instructions for is 10" wide.

Well I wasn't having that, let me tell you!

The Cherry on Top papers are ideal for diddy gift wrapping, and so after a dash of tweaking, a smidge of fiddling & only minimal swearing I've worked out how to make an extra small bag. It's ideal for gifting a scented tea light, jelly beans, a lolly pop or anything else that measures roughly  1" by 1.5" by 2".

To make it, you pretty much follow the instructions supplied with the board - you just need to have the edge of the paper in a slightly different place at different times.

Here's a video that shows you how:


And here's the order in which you need to punch and score :

  1. Take a piece of paper 6x6".
  2. Line up the left edge of the paper on the start line & punch.
  3. Score horizontal line.
  4. Line up left edge of the paper with the triangle side score line (the sticky out triangle bit) & score on the S vertical line.
  5. Line up the score line created in 4. with the start line & punch.
  6. Line up the score line created in 4. with the triangle side score line & score on the 2nd vertical "side" line (the one before the S line).
  7. Line up the score line created in 6. with the start line & punch.
  8. Position the paper so that the triangle side score line on the board is mid way between the 1st & 2nd vertical score lines & score down to create the gusset.
  9. Line up the 3rd vertical score line with the triangle side score line & score on the S vertical line & horizontally.
  10. Line up the score line created in 9. with the start line & punch.
  11. Line up the score line created in 9. with the triangle side score line & score on the 2nd vertical "side" line.
  12. Line up the score line created in 11. with the start line & punch.
  13. Position the paper so that the triangle side score line on the board is mid way between the 4th & 5th vertical score lines & score down to create the gusset.


Tuesday, 2 June 2015

New catalogue thanks card

 
Woo hoo! From today you can order from Stampin' Up!'s new annual catalogue.
 
It's packed full of delicious new stuff, and if you spend enough (not difficult) you can qualify for one of the new hostess sets, like this one. It's called Silhouettes & Script and it's got lovely solid images that lend themselves to multicolour stamping and stamp kissing.
 
Anyway, enough hanging around here, go take a look.
 
Well go on!!


Monday, 1 June 2015

Milk carton style box with the gift bag punch board (video)

 
Wheeeeeeee! the new catalogue launches tomorrow and one of Stampin' Up!'s new releases is the Gift Bag Punch Board (#135862), which makes tall gift bags in a variety of sizes. But with minimal tweaking and just a smidge of swearing, you can also create darling little milk carton style boxes with them.
 
This box uses a 6 1/8" x 11 3/4" piece of cardstock (basically, an A4 sheet trimmed along the shorter edge).
 
It makes a box that is roughly 2 3/4 x 2 3/4 x 2 1/2" (excluding the "roof space"). It's slightly smaller than the box created by the Bakers Box Thinlits in the new catalogue (#138279), but the Gift Bag Punch Board is quite a bit cheaper and it does two things, so to my mind it's an easy choice between the two. It's still big enough to pop in a cupcake, or sweets or biscuits etc (not milk though!).
 
Here's a short video on how to make one:
 
 
I used papers from the Cherry On Top 6x6 paper stack (#138443) and the coordinating cardstock (#139013). The "surprise" stamp is from the Amazing Birthday stamp set (#134228).
 
 
The Gift Bag Punch Board and Cherry on Top papers are available to buy from 2 June 2015. You can buy them from my Stampin' Up shop : http://sambracegirdle.stampinup.net or click on Shop now in the side bar >>>